Visual Test Shell – Configuring Ports
After configuring some devices and objects, the next step is to configure the ports (or connections) to connect to these devices. For the Visual Test Shell (VTS) to be able to communicate with a device, a Port must refer to a configured Device object. Follow these instructions to configure ports in the VTS.
1) In the “Edit” menu, Select the “Ports…” menu option (see Figure 1: Configuring Ports)
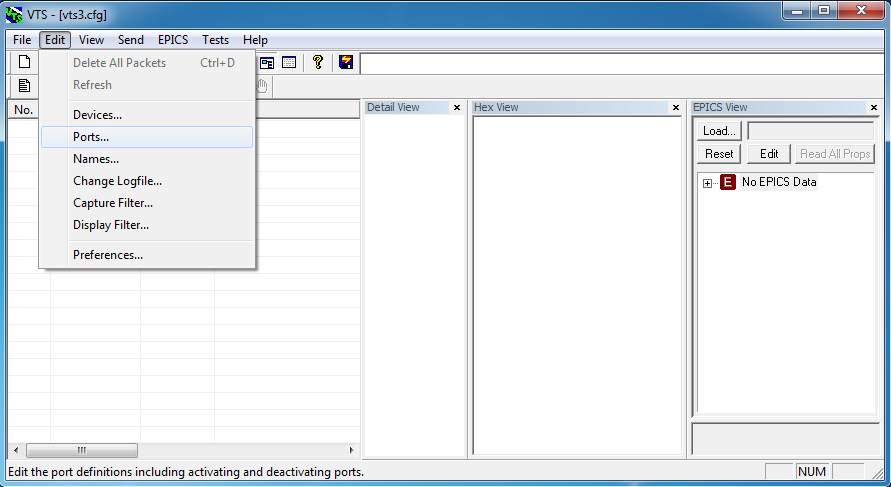 Figure 1: Configuring Ports
2) You will see the Ports Configuration Dialogue. Click on the “New” button to begin configuring a new port (see Figure 2: Port Configuration Dialgue – New Port)
 Figure 2: Port Configuration Dialogue – New Port
3) Fill in the Fields for the Port (see Figure 3: New Port Configuration)
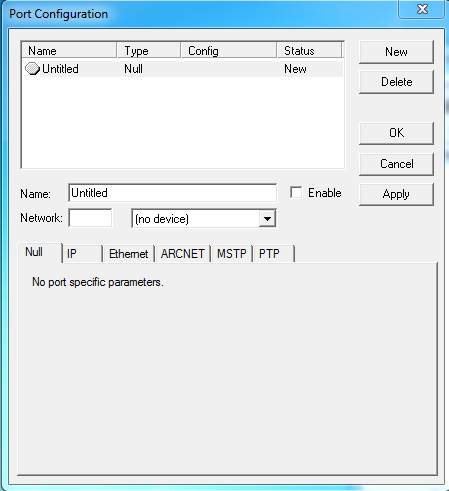 Figure 3: New Port Configuration
Here is a brief description of these fields.
- Name – The name of the Port (helps with identification)
- Network – The network the port exists on.
There is also a drop down menu containing a list of configured devices. Select one of these devices to signify a connection on this port to that specific device.
Below is a set of tabs that detail the specific type of port. The next step will detail to different types of ports and some of their configuration fields.
4) Select a tab to choose the type of the port. Null contains no specific parameters.
– IP – The IP tab is for setting up a BACnet IP port connection (see Figure 4: IP Port Configuration)
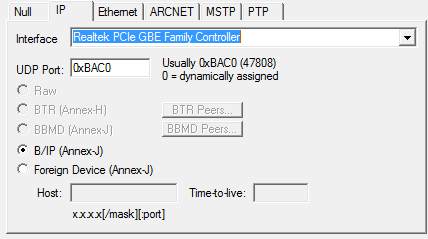 Figure 4: IP Port Configuration
- Interface – This drop down menu contains a list of network cards installed on the computer. Select one of them.
- UDP Port – The is the port that the connection is on. Default is 47808 (0xBAC0)
These two are usually enough for the configuration of a simple BACnet IP port.
– Ethernet – The Ethernet tab is for setting up a BACnet Ethernet port connection (see Figure 5: Ethernet Port Configuration)
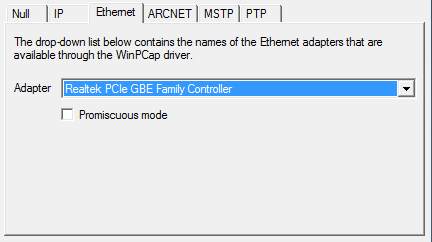 Figure 5: Ethernet Port Configuration
- Adapter – This drop down menu contains a list of network cards installed on the computer. Select one of them.
- Promiscuous mode – Check this box if you want to enable this mode.
– MSTP – The MSTP tab is for setting up a BACnet MSTP port connection (see Figure 6: MSTP Port Configuration)
 Figure 6: MSTP Port Configuration
- MAC Address – The unique address of the port.
- Max Master – The maximum number of master devices to iterate through when passing the token.
- Max Info Frames – The maximum number of information frames.
- Baud Rate – The baud rate for the connection to the port.
– PTP – The PTP tab is for setting up a BACnet PTP port connection (see Figure 7: PTP Port Configuration)
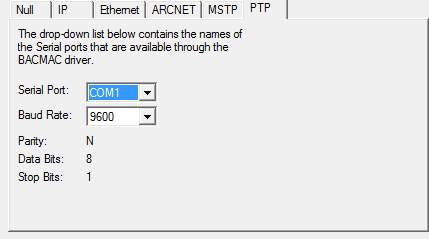 Figure 7: PTP Port Configuration
- Serial Port – The serial port connection.
- Baud Rate – The baud rate for the connection to the port.
- Parity – Set at N (None).
- Data Bits – Set at 8.
- Stop Bits – Set at 1.
5) Once a port type has been selected and configured, Check the “Enable” check box to enable the port and Click the “OK” or “Apply” buttons to save the configuration and close the dialogue (see Figure 8: Finishing Port Configuration)
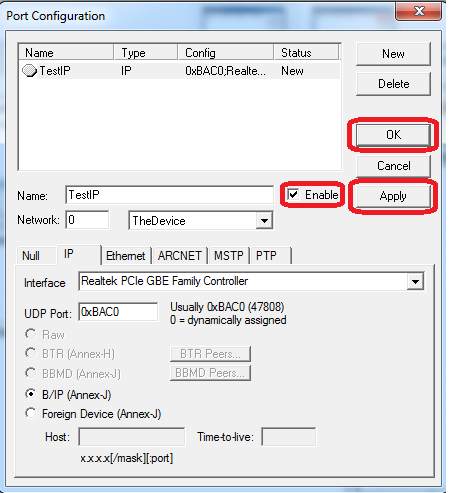 Figure 8: Finishing Port Configuration
Once one or multiple ports have been configured the next step is to configure Names. The next article will detail the steps and describe some of the options and fields required for configuring Names.