BACnet - How do I configure devices using Visual Shell Test
To Configure a Device in the Visual Test Shell (VTS), follow these instructions.
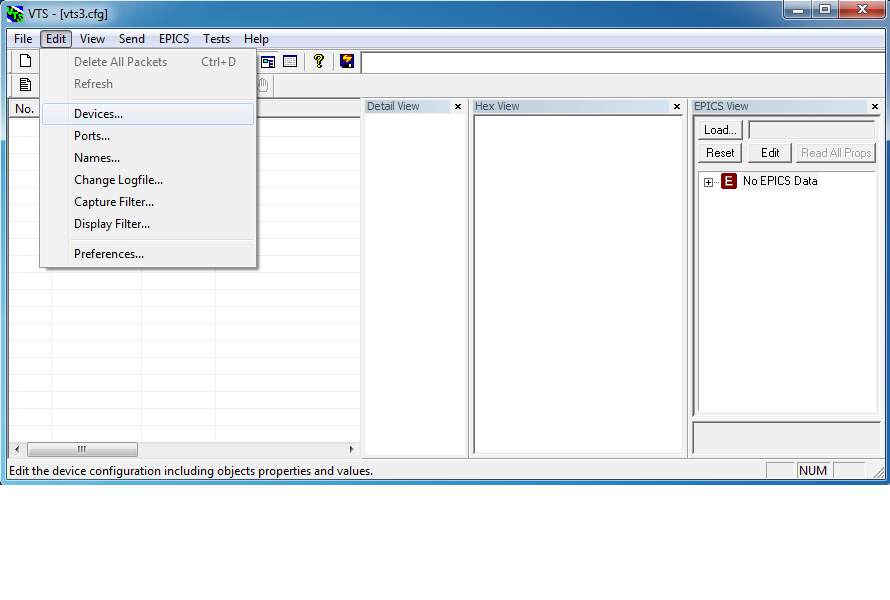
1) Click on the "Edit" menu and Selectthe "Devices…" option
Figure 1: Edit Menu Options
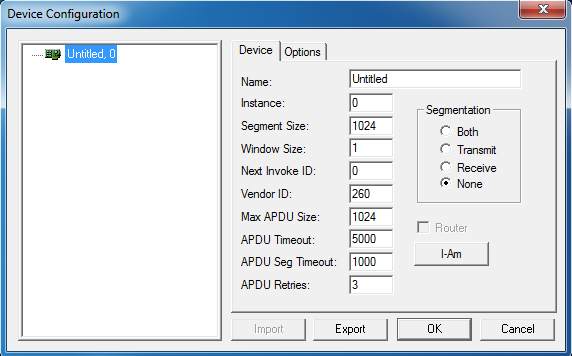
2) You will now see the Devices Configuration Dialogue as shown below.
Figure 2: Device Configuration Dialogue
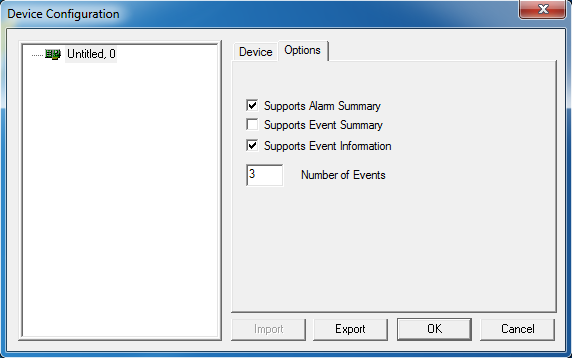
3) Fill in the necessary fields for the tests that you want to run. The Device Tab contains device specific fields, such as Name, Instance, and Vendor ID (see Figure 2: Device Configuration Dialogue). The Options Tab contains various support options for the device (see Figure 3: Device Configuration Dialogue Options Tab).
Figure 3: Device Configuration Dialogue Options Tab
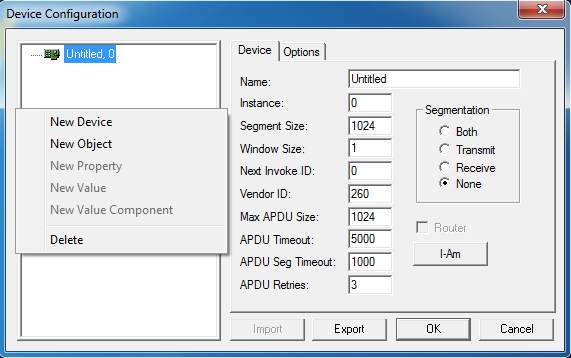
4) Right-Click the newly created device. In the Right-Click menu, Selectthe "New Object" option to add a new object to the selected device (see Figure 4: Device Configuration Dialogue Right-Click Menu). Or Select the "New Device" option to add a new device.
Figure 4: Device Configuration Dialogue Right-Click Menu
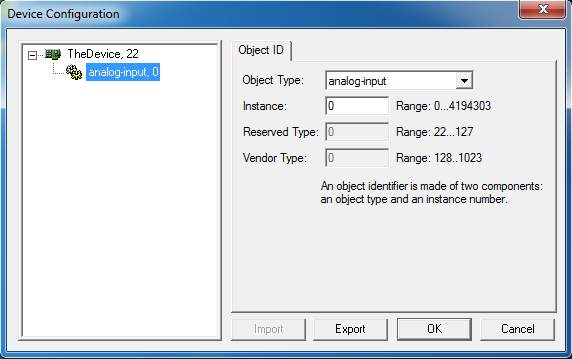
5) Fill in the object information fields (see Figure 5: Object Configuration).
Figure 5: Object Configuration
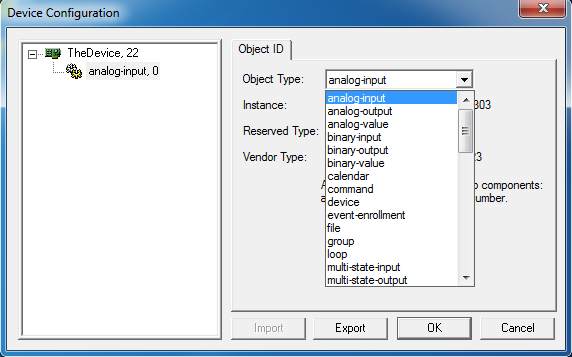
6) From the drop down menu, Select the Object Type (see Figure 6: Object Type Selection)
Figure 6: Object Type Selection
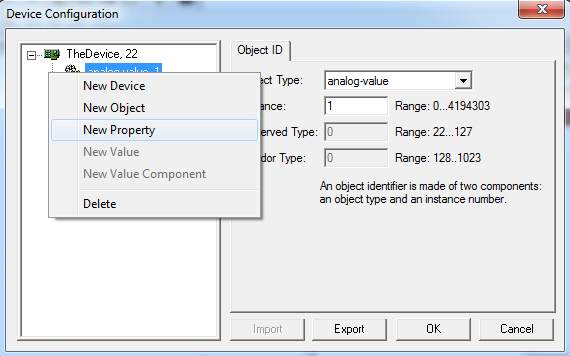
7) Right-Click the newly created object. In the Right-Click menu, Select the "New Property" option to add a new property to the selected object (see Figure 7: Device Configuration Dialogue Right-Click Object Menu).
Figure 7: Device Configuration Right Click Object Menu
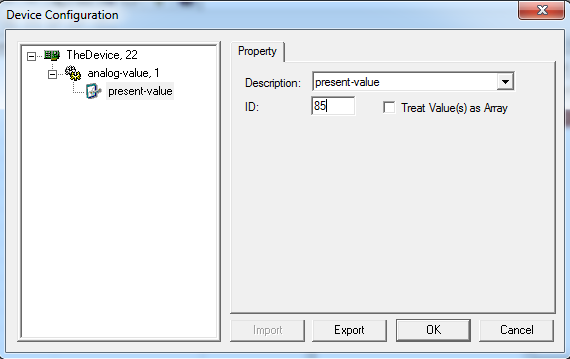
8) Fill in the property information. There are two ways to do this. 1) Select a property from the drop down "Description" menu. Or 2) Enter the property ID value in the "ID" text box (see Figure 8: Property Configuration).
Figure 8: Property Configuration
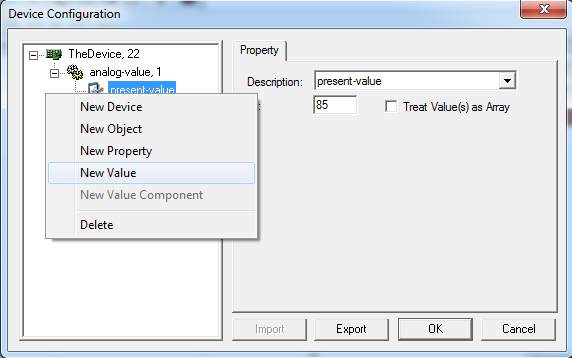
9) Right-Click the newly created property. In the Right-Click menu, Select the "New Value" option to add a new value to the selected property (see Figure 9: Device Configuration Dialogue Right-Click Property Menu).
Figure 9: Device Configuration Dialogue Right-Click Property Menu
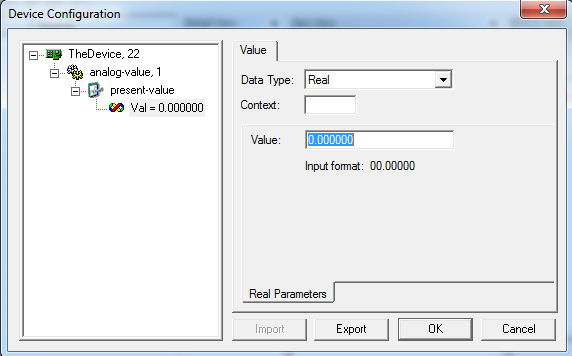
10) Fill in the information for the value. Select the data type from the "Data Type" drop down menu (for example: Boolean, Real, Integer, etc.). Enter the actual value in the "Value" text field (see Figure 10: Value Configuration).
Figure 10: Value Configuration
11) Repeat steps 7 through 10 to add more properties and values an object.
12) Repeat steps 4 through 6 and 11 to add more objects to a device.
13) Right-Click to bring up the Right-Click menu and Select the "New Device" option to create a new device (see Figure 4: Device Configuration Dialogue Right-Click Menu). Repeat steps 3 through 12 to configure another device.
