Configuring Multiple RLINKs on a GE TLC Dataline
The GE Total Lighting Controls (TLC) Dataline communications system supports multiple access points called RLINK modules. Each RLINK can provide global programming, monitoring, and control of distributed lighting automation panels on the same Dataline network.
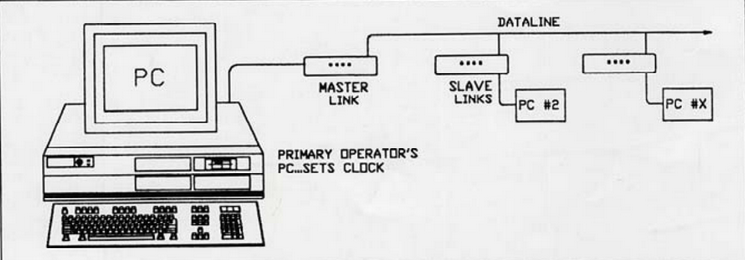
When multiple RLINKs are installed on one Dataline, the key system constraint is time-of-day broadcasting. To avoid conflicts, only one RLINK should broadcast the system time. In a multi-RLINK installation, one RLINK is configured as the Master and any additional RLINKs must be configured as Slaves. The Master RLINK is typically connected to the primary operator PC (the workstation used to set and manage the system clock).
This article explains the recommended approach for installing multiple RLINKs on one Dataline and shows how to configure secondary RLINKs as Slaves by changing an internal switch setting.
System Design Notes for Multiple RLINK Installations
In a multi-RLINK system, the purpose of adding additional RLINKs is typically to provide extra access points for programming and maintenance (for example, multiple workstations, multiple maintenance locations, or staged commissioning access). Each RLINK can communicate with the TLC panels on the Dataline, but only one should be responsible for time-of-day broadcast to prevent competing time updates.
Practical guidance:
- Choose one RLINK as the Master (usually the one connected to the main operator PC).
- Configure all additional RLINKs as Slaves to prevent time broadcast conflicts.
- If you experience inconsistent time behavior, scheduling issues, or repeated clock changes, verify that only one RLINK is operating as Master.
Note: Some teams have reported operating two RLINKs in Master mode successfully in certain circumstances. However, the standard and safest approach for predictable scheduling behavior is to configure a single Master and set all additional units to Slave.
Changing an RLINK from Master to Slave
Use the procedure below to configure the 2nd, 3rd, and subsequent RLINK units as Slaves. The steps are based on the physical switch inside the RLINK housing.
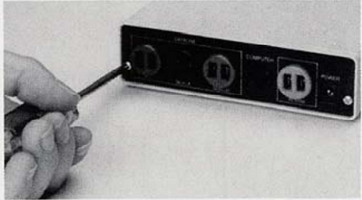
Step 1: Remove the two Phillips screws in the rear panel.
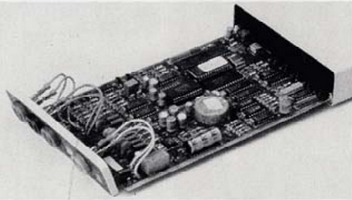
Step 2: Slide the board assembly out of the housing as a unit.
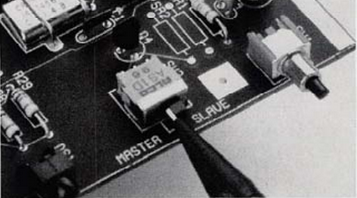
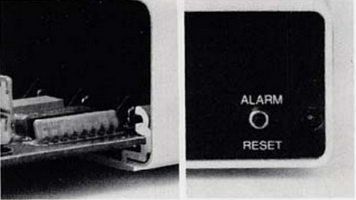
Step 3: Move the slide switch in the front right corner to the Slave position.
Step 4: Position the board in the extruded rails and slide it back into place, ensuring the ALARM RESET button clears the front face plate.
After reassembly, confirm the RLINK is connected to the Dataline as intended and verify that your system clock and schedules behave consistently. If multiple workstations are used, confirm which PC is responsible for setting the master time-of-day reference.
GE TLC to LightSweep Retrofit Solutions
Many GE TLC installations are now considered legacy systems, and long-term maintainability can be impacted by obsolete components, aging control electronics, and limited availability of replacement parts. In these cases, a retrofit strategy can preserve the value of existing panels while modernizing the control layer.
Chipkin provides GE TLC to LightSweep retrofit solutions designed to replace legacy control electronics while reusing the existing relays and wiring wherever practical. This approach is often used to restore or improve scheduling, automation, and ongoing serviceability without the disruption and cost of a full panel replacement program.
Learn more about the retrofit kits here: LightSweep Retrofit Kits for the Legacy TLC Panels
Case Study – GE Total Lighting Controls (TLC) Retrofit to LightSweep
Dec 2025 - GE TLC Retrofit to LightSweep
Sacramento County’s legacy GE TLC lighting panels lost automation after the ProSys Clock (RCLK8PS) became
obsolete. Chipkin supplied a LightSweep retrofit kit that replaced the control electronics
while reusing existing relays and wiring—restoring scheduling, automation, and reliability
with minimal downtime. A cost-effective, future-ready alternative to full panel replacement.
Frequently Asked Questions (FAQ)
Why can’t multiple RLINKs all operate as Master?
In a multi-RLINK system, time-of-day broadcast conflicts can occur if more than one unit attempts to act as the
time source. The typical best practice is to use one Master and configure all additional RLINK units as Slaves.
Which RLINK should be the Master?
The Master is typically the RLINK connected to the primary operator workstation—the PC used to set the system
clock and perform global scheduling or management functions.
What symptoms suggest an RLINK configuration conflict?
Common symptoms include inconsistent clock behavior, schedules triggering at unexpected times, or repeated clock
changes. In these cases, confirm that only one RLINK is configured as Master.
Can I add multiple access points for programming TLC panels?
Yes. Multiple RLINKs can be used as access points on the same Dataline. Configure one as Master and set all
additional RLINKs to Slave to prevent time broadcast conflicts.
What is the benefit of a GE TLC to LightSweep retrofit?
A retrofit can modernize legacy TLC control electronics while preserving existing relays and wiring, improving
long-term maintainability and restoring automation features without full panel replacement.